DIY (Do-It-Yourself) projects offer a wonderful opportunity to inject personality, creativity, and style into your home.
Not only do DIY projects save you money, but they also provide a sense of accomplishment and allow you to create something uniquely tailored to your tastes.
Whether you’re a novice or a seasoned crafter, there are countless ways to upgrade your living space with a few simple materials and tools.
In this article, we’ll explore 10 easy DIY projects that can instantly elevate the look and feel of your home.
From wall art to furniture makeovers and functional decor ideas, these projects are designed to suit all skill levels and budgets.
With step-by-step instructions and a little creativity, you’ll be able to transform any room in your house into a stylish and inviting environment.
So, roll up your sleeves and let’s get started on your home makeover journey!
10 Easy DIY Projects to Upgrade
Wall Art with Canvas and Paint
Create Personalized Art to Reflect Your Style
One of the easiest and most cost-effective ways to upgrade any room is by creating your own wall art.
Whether you’re decorating a living room, bedroom, or office, personalized art can bring the room together, adding color, texture, and warmth.
Instead of buying expensive pieces, why not try your hand at creating something unique?
Materials Needed:
- Blank canvas (or old canvas from a thrift store)
- Acrylic paints or fabric paints
- Brushes (different sizes)
- Painter’s tape (optional for geometric designs)
- Palette for mixing colors
- Newspaper or plastic sheets to protect surfaces
How to Do It:
- Choose the size of canvas based on the space you want to fill.
- If you’re feeling adventurous, create abstract shapes using painter’s tape or freehand some geometric patterns.
- Alternatively, paint a meaningful quote, nature-inspired scene, or even a minimalist design.
- Use colors that complement your existing decor to ensure the piece blends seamlessly into the space.
- Allow the paint to dry completely before hanging your masterpiece.
Pro Tip: You can make the art even more unique by adding texture using fabric, paper, or sand for added depth.
Floating Shelves
Maximize Space and Add a Modern Touch
Floating shelves are an excellent way to add storage and display space without occupying precious floor space.
They’re sleek, minimalist, and perfect for showcasing decorative items like books, plants, or artwork.
Floating shelves can transform any wall into an elegant focal point and are especially useful in smaller spaces where traditional storage might be limited.
Materials Needed:
- Floating shelf brackets
- Wood boards (for shelves)
- Screws and anchors
- Drill and screwdriver
- Leveler
How to Do It:
- Decide where you want to place your shelves. Make sure it’s a spot that will be functional but also eye-catching.
- Measure and mark the wall where the brackets will be installed. Use a level to ensure the brackets are even.
- Drill holes into the wall and insert wall anchors if necessary to secure the shelf brackets.
- Attach the shelf boards to the brackets according to the manufacturer’s instructions.
- Style the shelves with your favorite books, decorative pieces, or plants.
Pro Tip: Opt for a wooden finish that complements your furniture or go for a more industrial look with metal brackets.
Upcycled Furniture
Transform Old Furniture into New Treasures
Upcycling old furniture is a fantastic way to save money and reduce waste while giving your living space a fresh look.
Whether you have an old coffee table, dresser, or chair that’s seen better days, a few small changes can make it feel brand new again.
From painting to reupholstering, there are endless possibilities to personalize your furniture and make it match your style.
Materials Needed:
- Sandpaper or electric sander
- Paint (chalk paint, spray paint, or wood stain)
- New knobs or handles
- Fabric (if reupholstering)
- Staple gun
How to Do It:
- Start by sanding the surface of the furniture to remove any imperfections and to help the paint adhere better.
- Apply a coat of primer, followed by your chosen paint or stain. Depending on the style, you may want to go for a distressed look or something smooth and polished.
- If you’re reupholstering, remove the old fabric, and staple the new material tightly to the frame.
- Replace old knobs or handles with modern or vintage-style ones to give your piece a fresh look.
Pro Tip: Don’t be afraid to mix materials! For example, you can paint a wooden dresser and swap out the knobs with metallic ones for a modern twist.
Indoor Plant Wall
Bring Nature Inside with a Vertical Garden
Plants are known for their ability to improve air quality and brighten up a room.
A vertical plant wall is a creative way to incorporate greenery into your home while saving space.
Not only does it add a refreshing natural element to your decor, but it also creates a calming atmosphere.
Materials Needed:
- Wooden pallet or plant hangers
- Pots or planters (small to medium-sized)
- Plants (succulents, herbs, or trailing plants)
- Drill or nails (for mounting)
- Potting soil
How to Do It:
- Start by selecting plants that thrive indoors, such as succulents, ferns, or pothos.
- If you’re using a pallet, mount it on the wall at a height that suits your space.
- Secure the pots or planters to the pallet or hang them from wall hooks.
- Fill the pots with soil and plant your chosen greenery.
- Water your plants as needed and maintain their health for a lush vertical garden.
Pro Tip: You can also add decorative elements like fairy lights or small statues to enhance the visual appeal of the plant wall.
Custom Curtains
Add Personality and Style to Your Windows
Curtains can make a huge difference in the ambiance of a room. Instead of settling for generic store-bought options, why not make your own custom curtains to match your home’s aesthetic?
You can choose fabrics that align with your color palette and incorporate fun patterns or textures for added interest.
Materials Needed:
- Fabric of your choice
- Sewing machine or needle and thread
- Curtain rod
- Scissors and measuring tape
- Iron
How to Do It:
- Measure your windows to determine the amount of fabric you’ll need.
- Cut the fabric according to your measurements, allowing extra fabric for hems.
- Sew the hems along the edges of the fabric, folding the fabric over and using the iron to press it flat.
- Attach the curtains to the rod, and hang them up in your window.
- Style with tiebacks, beads, or other decorative elements.
Pro Tip: Choose fabrics that not only match your aesthetic but also offer practical benefits, like light-blocking or noise reduction.
Upgraded Light Fixtures
Elevate Your Lighting with DIY Fixtures
Lighting can dramatically alter the mood of a room, and upgrading your light fixtures is an easy way to refresh your space.
If you’re looking to add a touch of elegance or modernity, consider making your own lighting fixtures using everyday materials.
From chandeliers to pendant lights, these DIY light fixtures will illuminate your home in style.
Materials Needed:
- Light fixture kits
- Pendant lights, bowls, baskets, or other materials for the fixture
- Drill and screws
- Ceiling hook or plate
How to Do It:
- Choose a base for your light fixture, such as a bowl, basket, or colander.
- Drill a hole in the base large enough to fit the light socket.
- Attach the light fixture kit to the base according to the instructions.
- Install a ceiling hook or plate to hold the fixture in place.
- Add a light bulb, and turn on the switch to see the transformation!
Pro Tip: For a more rustic or industrial look, consider using a metal wire basket or reclaimed wood to create the light fixture base.
Peel-and-Stick Wallpaper
Instantly Transform Your Walls with Peel-and-Stick Wallpaper
Peel-and-stick wallpaper is an affordable and hassle-free way to add visual interest to your walls.
Whether you want to create an accent wall or cover an entire room, peel-and-stick wallpaper comes in various designs, textures, and colors, giving you endless options to personalize your space.
Materials Needed:
- Peel-and-stick wallpaper rolls
- Scissors or utility knife
- Measuring tape
- Leveler
How to Do It:
- Measure the dimensions of your wall to determine how many wallpaper rolls you’ll need.
- Cut the wallpaper to fit the height and width of the wall.
- Peel off the backing and carefully apply the wallpaper to the wall, starting from the top and smoothing out any air bubbles.
- Trim any excess wallpaper at the edges.
- Use a leveler to ensure the pattern lines up properly.
Pro Tip: Choose a wallpaper with a bold design for accent walls or go for subtle patterns for an elegant, timeless look.
Repurpose Wooden Crates
Create Functional and Stylish Storage Solutions
Wooden crates are not only affordable but also highly versatile when it comes to home decor.
They can be repurposed into furniture, storage units, or decorative pieces with a little creativity.
By stacking them, painting them, or adding wheels, you can create a functional yet stylish addition to any room.
Materials Needed:
- Wooden crates
- Paint or stain (optional)
- Nails or screws (if stacking)
- Wheels (optional)
How to Do It:
- Decide how you want to use the crates—whether stacked vertically for storage or horizontally as a side table.
- Sand the crates for a smoother finish.
- Paint or stain the crates to match your decor.
- Attach wheels to the bottom for easy mobility or stack them securely to create a multi-level storage unit.
- Use the crates to store books, blankets, or any other items you want to keep within reach.
Pro Tip: Stack several crates to form a coffee table or mount them on the wall to create open shelving.
DIY Rug
Add a Personalized Touch with a Handmade Rug
A rug can instantly elevate a room by adding color, texture, and warmth.
Instead of purchasing an expensive rug, why not make one yourself?
Whether you use fabric, old t-shirts, or even burlap, a handmade rug can be customized to fit your home’s color scheme and style.
Materials Needed:
- Old fabric, burlap, or t-shirt strips
- Scissors
- Rug backing or non-slip mat
- Hot glue gun or sewing materials
How to Do It:
- Cut your fabric into strips of equal length.
- Arrange the strips in the desired pattern (braided, knotted, or woven).
- Attach the strips to the rug backing or non-slip mat using a hot glue gun or by sewing.
- Trim any excess fabric for a neat finish.
Pro Tip: Use fabric that complements the existing decor in your space to ensure the rug ties the room together.
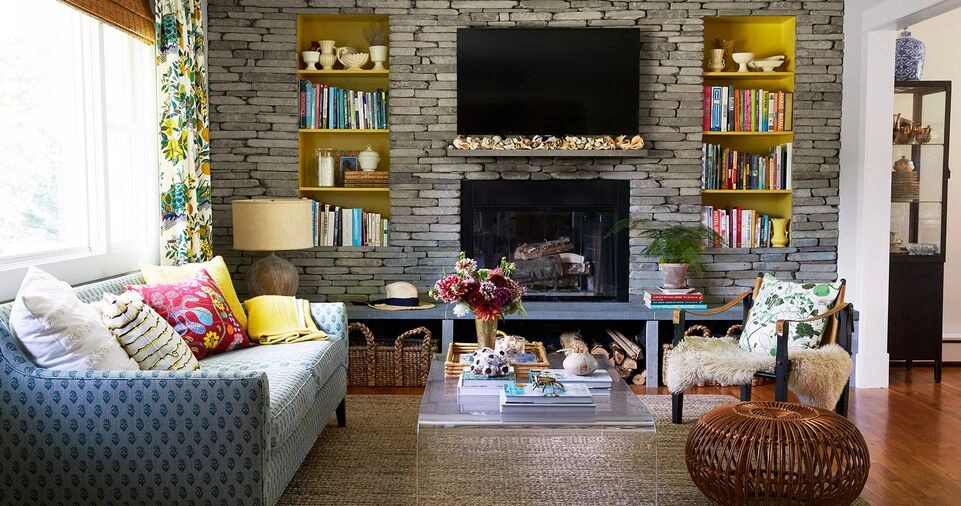
Decorative Throw Pillows
Enhance Your Furniture with Custom Pillows
Throw pillows are an affordable and easy way to refresh your furniture without having to buy new pieces.
By making your own pillows, you can choose fabrics, colors, and patterns that match your style, giving your couch or bed a personalized touch.
Materials Needed:
- Fabric of choice
- Pillow inserts
- Sewing machine or needle and thread
- Scissors
How to Do It:
- Measure your pillow insert to determine the fabric size needed.
- Cut two fabric pieces slightly larger than the pillow insert.
- Sew the edges together, leaving one side open for inserting the pillow.
- Turn the fabric inside out, insert the pillow, and sew the open edge shut.
- Decorate with tassels, embroidery, or other embellishments.
Pro Tip: For a cozy, layered look, mix and match different fabrics, colors, and textures for your throw pillows.
ALSO READ:
Last Words!
By taking on these simple and fun DIY projects, you can easily upgrade your living space without breaking the bank.
Whether you’re adding artwork, creating storage solutions, or customizing furniture, these projects offer endless opportunities to personalize your home.
So, gather your materials and start transforming your living space today!