In today’s world of sustainability and creative expression, upcycling old furniture has become a popular trend.
Instead of discarding outdated or worn-out furniture, people are finding innovative ways to transform these pieces into stylish, functional, and personalized treasures.
Not only does upcycling contribute to reducing waste, but it also allows you to add a unique touch to your home without breaking the bank.
Whether you have an old wooden chair, a scratched-up coffee table, or a worn-out dresser, upcycling offers endless possibilities.
With a bit of creativity, the right tools, and some elbow grease, you can turn outdated furniture into beautiful statement pieces that enhance your home’s aesthetics.
This guide will take you through each step of the upcycling process, from planning and preparation to finishing and showcasing your masterpiece.
Whether you’re a beginner or a seasoned DIY enthusiast, these tips will help you breathe new life into your old furniture.
Let’s dive into the world of upcycling and discover how you can create new treasures from old pieces!
Why Upcycling Old Furniture is Beneficial
Environmental Impact
Upcycling old furniture helps reduce landfill waste, lowering the environmental footprint of discarded items.
Every year, millions of pieces of furniture end up in landfills, contributing to pollution and deforestation.
By upcycling, you extend the lifespan of these items and reduce the need for new raw materials.
Cost-Effective
Instead of spending hundreds or even thousands of dollars on new furniture, you can refurbish what you already have.
Upcycling requires minimal investment—sometimes just a can of paint, new upholstery, or replacement parts.
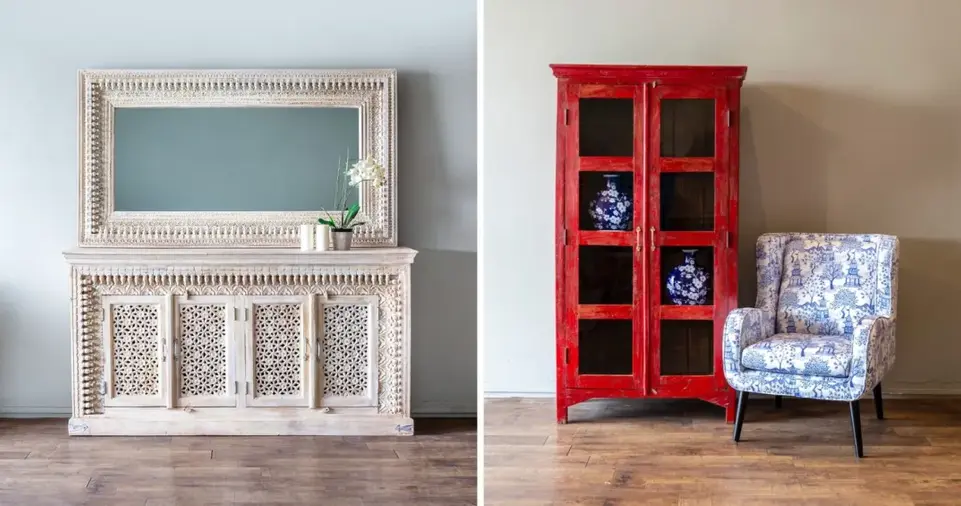
Uniqueness and Personalization
Unlike mass-produced furniture, upcycled pieces have a distinct character. You can tailor them to fit your personal style, whether that’s modern, rustic, vintage, or artistic.
Quality Over Quantity
Many older furniture pieces are made from solid wood and high-quality materials that are no longer used in modern, mass-produced furniture.
Upcycling allows you to preserve these superior materials while giving them a new look.
ALSO READ: Budget-Friendly Ways to Make Your Bedroom Feel Luxurious
Step by Step Guide to Upcycle Old Furniture into New Treasures
Step 1: Planning Your Upcycling Project
Before you start sanding or painting, it’s crucial to plan your project thoroughly.
Consider the following aspects:
Assess the Condition of the Furniture
- Check for structural damages such as broken legs, deep scratches, or missing pieces.
- Ensure it’s sturdy enough to be reused. If it’s too damaged, consider repurposing the materials instead.
- Determine if repairs are necessary before you begin painting or staining.
Decide on a Style and Purpose
- Do you want a vintage, shabby chic, or modern finish?
- Will the furniture serve the same purpose, or will it be repurposed?
- Take inspiration from Pinterest, DIY blogs, and magazines to find creative ideas.
Gather Supplies
- Sandpaper or electric sander
- Paints, stains, and brushes
- Wood glue and filler
- New hardware such as knobs, handles, and hinges
- Protective sealants
Having a clear plan ensures a smoother and more successful upcycling project.
Step 2: Cleaning and Preparing the Furniture
Preparation is key to achieving a professional-looking finish.
Follow these steps:
Clean the Furniture Thoroughly
- Use a damp cloth with mild soap to remove dust, dirt, and grease.
- For stubborn stains, use a degreaser or vinegar solution.
- Allow the furniture to dry completely before proceeding.
Sand the Surface
- Sanding removes old paint, varnish, and imperfections.
- Use coarse-grit sandpaper (80-100 grit) for rough surfaces and fine-grit (200-300 grit) for a smooth finish.
- Wipe off sanding dust with a tack cloth.
Repair and Fill Imperfections
- Fill cracks, holes, or scratches with wood filler.
- Reinforce loose joints with wood glue.
- Let repairs dry and sand again for a seamless finish.
Step 3: Choosing a New Look for Your Furniture
Now comes the exciting part—designing your upcycled piece!
Consider the following options:
Paint and Stain
- Chalk paint creates a matte, vintage look.
- Glossy paint gives a modern, sleek finish.
- Staining enhances the natural wood grain for a rustic appeal.
- Spray paint is an easy and quick option for a smooth finish.
Decoupage and Decorative Techniques
- Use wallpaper, fabric, or decorative paper to add texture and patterns.
- Apply stencils or hand-painted designs for a custom look.
- Distress the paint using sandpaper for an antique effect.
Step 4: Adding New Features
To further enhance the transformation, consider adding new elements to the furniture:
Replace Hardware
- Swap outdated knobs, handles, and hinges with new, stylish alternatives.
- Choose brass, ceramic, or vintage-inspired hardware for a fresh look.
Reupholster Seats and Cushions
- Replace old fabric with new, trendy patterns.
- Use durable, high-quality upholstery materials.
- Add padding for extra comfort.
Modify Structure
- Attach new legs to give a table or dresser a contemporary look.
- Remove doors from cabinets to create open shelving.
- Add decorative trims or moldings to enhance the appearance.
Step 5: Protecting and Finishing Your Furniture
To ensure durability, apply a protective finish:
Seal the Surface
- Use polyurethane, wax, or lacquer to protect against scratches and wear.
- Allow proper drying time between coats.
Buff and Polish
- Polish the surface to add shine and smoothness.
- Wipe with a clean cloth for a professional look.
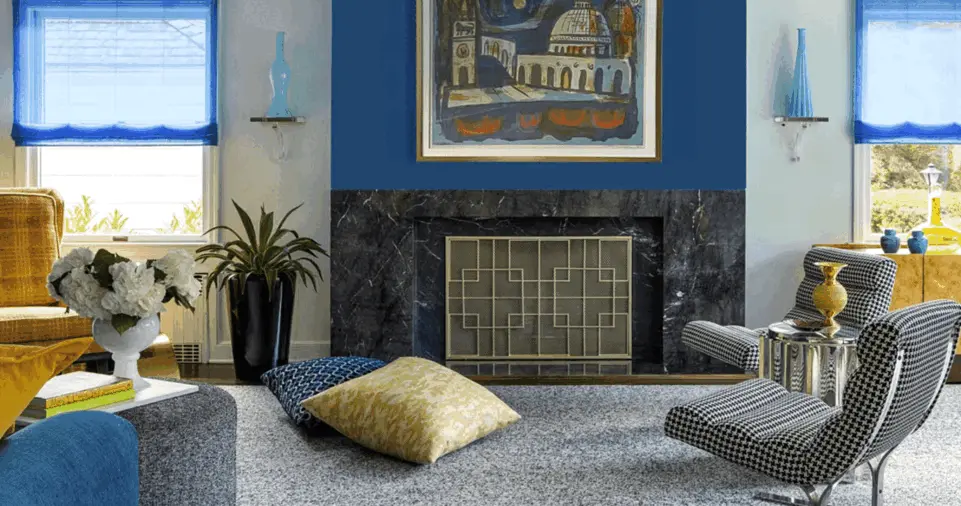
Step 6: Showcasing Your Upcycled Masterpiece
Once your furniture is complete, it’s time to style and display it:
Choose the Right Spot
- Place it in a room where it complements the décor.
- Use lighting to highlight its unique features.
Decorate with Accessories
- Add vases, books, or lamps to enhance its appeal.
- Incorporate textiles like cushions or throws.
Share Your Work
- Post before-and-after pictures on social media.
- Inspire others by sharing your creative journey.
ALSO READ: The Art of Decluttering: Tips for a Cleaner, Happier Home
Final Thoughts
Upcycling old furniture is not just a creative endeavor but also an eco-friendly and cost-effective way to decorate your home.
With proper planning, the right techniques, and a bit of patience, you can turn any old furniture piece into a beautiful, functional treasure.
Whether you’re revamping an old dresser, repurposing a door into a table, or giving a chair a fresh coat of paint, the possibilities are endless.
Start your upcycling journey today and create something truly unique for your space!